Vernier caliper parts and diagram
On this page
A vernier caliper has nine main parts: the beam and its main scale, the slider and its vernier scale, two pairs of jaws, a locking screw, a thumb wheel and a depth rod. This guide shows each part on a labelled diagram, explains what it does, and shows how the parts work together to take the four kinds of measurement.
What is a vernier caliper?
A vernier caliper is a hand-held instrument for measuring lengths more finely than a ruler can. It has two scales: the main scale gives the whole divisions, and the short vernier scale on the sliding jaw shows how far past the last division the jaw has gone. Adding the two gives a reading to a small fraction of a millimetre, or of an inch. The vernier scale is named after the French mathematician Pierre Vernier, who invented it in 1631.
One instrument measures four ways: outside sizes between the large jaws, inside sizes between the small jaws, depths with the depth rod, and steps with the end faces. Common least counts are 0.02 mm, 0.05 mm or 0.1 mm on metric calipers, and 0.001 in or 1/128 in on inch calipers. The caliper drawn here reads to 0.02 mm and measures up to 150 mm.
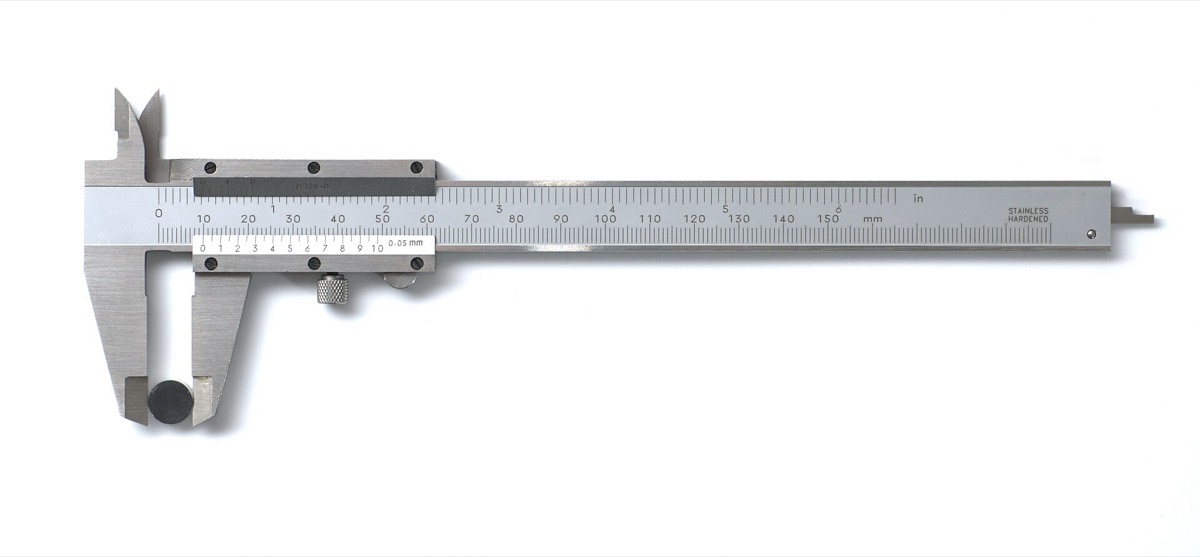

Labelled diagram of a vernier caliper
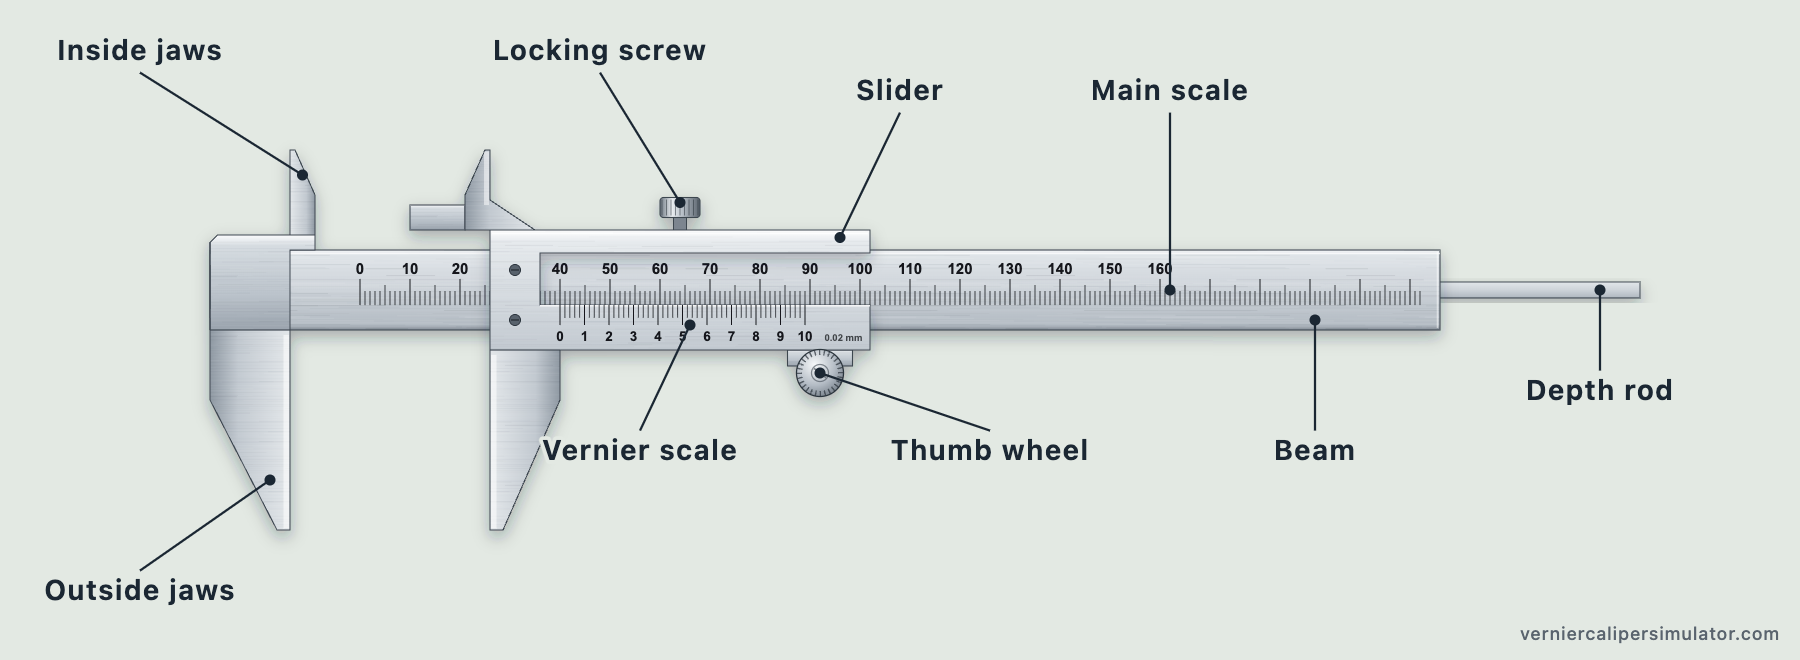
The parts and what each one does
The nine main parts are below, in the diagram’s order, followed by two features of them that you read or measure with. Textbooks and makers do not all use the same names, so the table gives the other names you are likely to meet.
| Part | Also called | What it does |
|---|---|---|
| Outside jaws | external jaws, lower jaws | The two large jaws below the beam, one fixed and one on the slider. Their flat inner faces close onto a part to measure an outside size: a thickness, a width or the diameter of a rod or ball. |
| Inside jaws | internal jaws, upper jaws | The two small jaws above the beam. Their outer edges open against the walls of a hole or slot to measure an inside size. |
| Main scale | fixed scale | The ruler engraved along the beam, in millimetres (or inches on an inch caliper). It gives the first part of every reading: the last line at or before the vernier zero. |
| Beam | main bar, frame | The long fixed bar that everything else is built on. The fixed jaws are at its left end and the slider runs along it. |
| Slider | sliding jaw, vernier head | The moving head. It carries the sliding jaws, the vernier scale, the locking screw, the thumb wheel and the depth rod, so all of them move together. |
| Vernier scale | sliding scale | The short scale on the slider, just below the main scale. Its lines are spaced slightly closer than one main-scale division (on a long vernier, than two), and the one line that sits exactly in line with a main-scale line gives the fine part of the reading. |
| Locking screw | lock screw, clamp screw | A screw on top of the slider. Tightening it holds the slider still, so the reading cannot change while you lift the caliper away to read it. |
| Thumb wheel | fine-adjustment wheel, thumb roller | A small knurled wheel under the slider. Rolling it with your thumb moves the jaw slowly, so it meets the part with a light, even touch. Some calipers have a ridged thumb rest instead. |
| Depth rod | depth probe, depth bar | A thin rod that slides out of the end of the beam as the jaws open. Rest the end of the beam on the top surface and the rod reaches down to measure a depth. |
| Vernier zero (feature) | index line | The first line of the vernier scale. It is the pointer you read the main scale against. With the jaws closed it should sit exactly on the main-scale zero. |
| Step faces (feature) | end faces | The end face of the beam and the end face of the slider. They are level when the caliper is closed and measure the height of a step. |
How the parts work together: four measurements
The sliding outside jaw, the sliding inside jaw, the depth rod and the slider’s end face all move with the slider, so they all open by exactly the same amount. That is why every kind of measurement is read on the same two scales, in the same way.
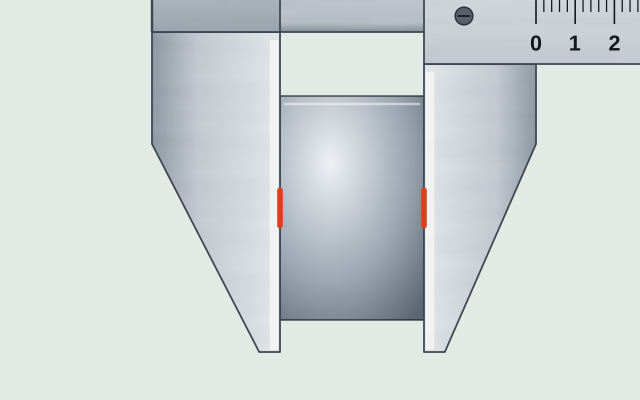
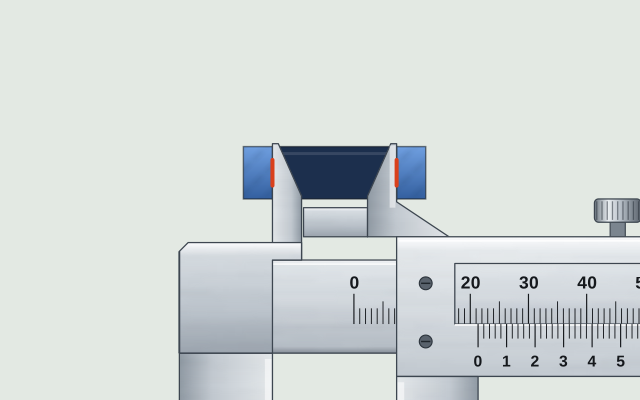
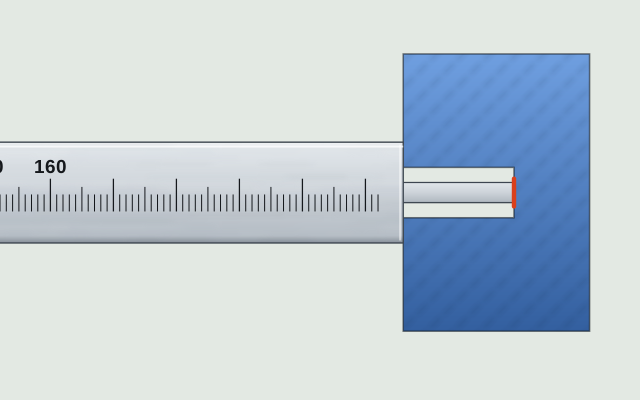
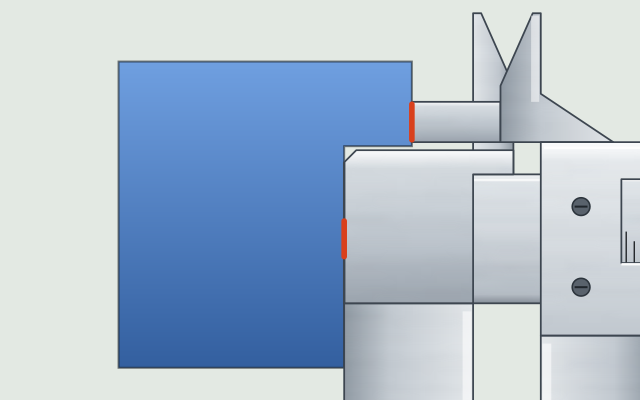
Close the jaws gently and keep the caliper square to the part. For an outside size, keep the smallest reading: a tilted caliper spans a slanted, longer distance. In a round hole, keep the largest reading across the hole, because anything smaller is not the full diameter, and the smallest along it, where tilted jaws span a slanted, longer line. For a depth, keep the beam upright: a leaning caliper reads too deep.
How the two scales give a finer reading
On the 0.02 mm caliper in the diagram, each main-scale division is 1 mm. The vernier has 50 divisions that together span 49 mm, so each vernier division is 0.98 mm: 0.02 mm shorter than a main-scale division. As the jaw opens, one vernier line after another comes into line with a main-scale line, and the number of that line counts the 0.02 mm steps past the main scale reading.
reading = main scale reading + (matching vernier line × least count)
least count = one main-scale division ÷ number of vernier divisions = 1 ÷ 50 = 0.02 mm
The step-by-step reading guide works through a full example with a picture of the scales, and the zero error section shows what to do when the vernier zero does not sit on the main-scale zero with the jaws closed.
How to draw a vernier caliper diagram
For a practical file or an exam answer, a neat diagram needs the parts in the right places and clear labels. Use a sharp pencil and a ruler.
- Draw the beam as a long, thin rectangle across the page.
- Mark the main scale along the lower half of the beam: short, evenly spaced lines, with longer lines numbered every 10 divisions.
- At the left end, draw the fixed outside jaw hanging below the beam and the fixed inside jaw standing above it.
- Draw the slider as a shorter rectangle around the beam, a little to the right, with its outside jaw below and its inside jaw above, facing the fixed jaws.
- Draw the vernier scale on the slider, just below the main scale, with its zero line at the left and numbered lines along it.
- Add the locking screw on top of the slider, the thumb wheel underneath it, and the depth rod sticking out of the right-hand end of the beam.
- Label each part with a straight line ending in a dot on the part, and write the least count beside the vernier scale.
Figure 1 can be used as a model. Keep the labels outside the drawing, and do not let label lines cross.
Vernier, dial and digital calipers
The beam, the two pairs of jaws, the locking screw and the depth rod are much the same on all three kinds. What changes is how the fine part of the reading is shown.
- Vernier caliper: the vernier scale on the slider, read by eye. It needs no battery.
- Dial caliper: a dial on the slider with a needle, driven by a toothed rack along the beam. The main scale still gives the whole divisions.
- Digital caliper: an electronic display with an on/off button, a button that sets zero at any position, and usually a button to switch between millimetres and inches. It has no vernier scale, though shops often sell it as a “digital vernier caliper”.
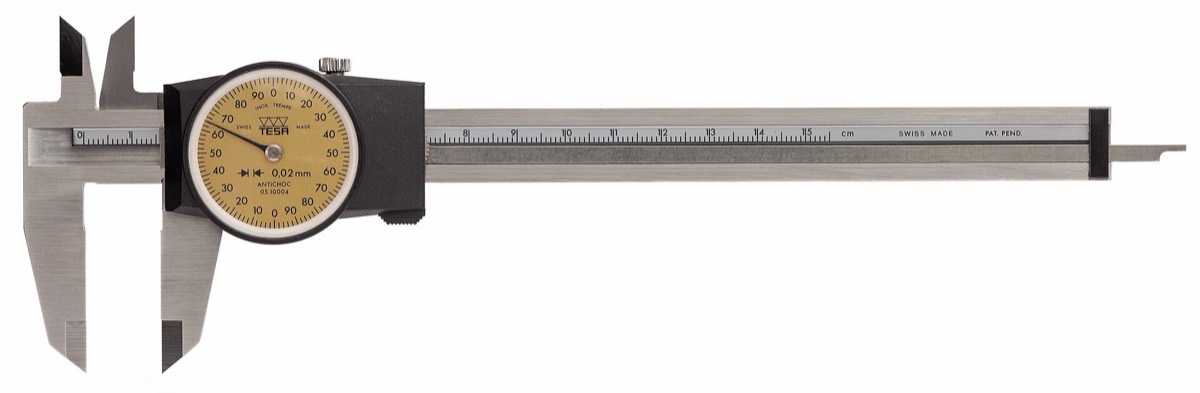

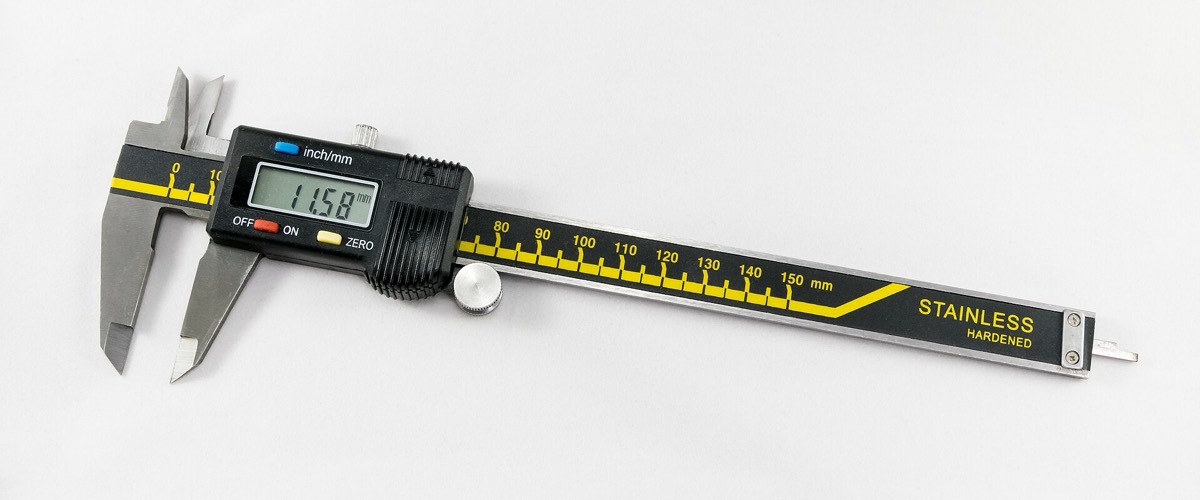

Makers such as Mitutoyo produce all three kinds. Whatever the make, check the least count, which is usually engraved on the vernier plate, before you read a vernier caliper.
Looking after the parts
- Clean the jaws and close them gently before you start, and check that the vernier zero sits on the main-scale zero.
- Close the jaws with a light touch. Excess force can deform the part or tilt the slider and change the reading.
- The inside jaws are thin and easy to damage. Never use them to scribe a line or prise something open.
- Loosen the locking screw fully before moving the slider, or it will wear the beam.
- The depth rod is slender. Lower it gently and never let it carry the weight of the caliper.
Questions about the parts
What are the main parts of a vernier caliper?
Nine: the outside jaws, the inside jaws, the main scale, the beam, the slider, the vernier scale, the locking screw, the thumb wheel (a thumb rest on some calipers) and the depth rod. Two features of these parts matter too: the vernier zero, which you read the main scale against, and the end faces of the beam and slider, which measure steps.
What is the function of the vernier scale?
The vernier scale lets you read a fraction of the smallest main-scale division. On a 0.02 mm caliper, 50 vernier divisions span 49 mm, so each is 0.98 mm, just 0.02 mm shorter than a main-scale division. The vernier line that sits exactly in line with a main-scale line tells you how many 0.02 mm steps to add to the main scale reading.
What is the depth rod used for?
The depth rod measures the depth of a hole, a slot or a beaker. It slides out of the end of the beam by exactly the same distance as the jaws open, so the depth is read on the same scales in the same way.
Why does a vernier caliper have two pairs of jaws?
The large outside jaws close onto a part to measure outside sizes such as a diameter or a thickness. The small inside jaws open inside a hole or slot to measure inside sizes. Both pairs open by the same amount, so both are read on the same scales.
Which part of a vernier caliper holds the reading?
The locking screw on top of the slider. Tighten it once the jaws touch the part and the slider cannot move while you read the scales. Loosen it fully before moving the slider again.